EVERY SCUBA DIVER BEGINS his or her underwater adventure by performing some type of entry into the water. If diving from a boat, a diver may enter the water with a giant stride or a back roll, depending on the conditions and type of boat. However, these entries are not suitable if the water is too shallow or if the entry platform is too close to the water. In addition, some divers, including those with back problems, have concerns about performing these entry types. This is when the controlled seated entry offers a safe and practical alternative.
About the Controlled Seated Entry
The controlled seated entry (CSE) is pretty much as its name implies — it’s a controlled entry done from a seated position. The CSE is typically performed from a platform no higher than 12 to 18 inches (30 to 46 cm) above the surface of the water. Platforms include small boats, swim platforms, pool decks, a dock or the gunwale of an inflatable. The CSE can typically be done in place of the giant stride or backroll entry and allows a slow, gentle entry instead of a big splash.
It is appropriate to use the seated entry when obstacles may be below the surface or when attempting to enter water with a current. Using this type of entry in a current, allows you to hold onto the platform or current line until your group is ready to descend together. By descending together, you are less likely to be separated from your group.
The seated entry is also helpful if you prefer to slip into your scuba unit after entering the water. This technique is very useful for divers with back problems or other issues because the weight of the gear is not placing strain on your back. At the end of the dive, you can remove the scuba unit before exiting the water. Just be sure that your buddy or a crewmember is available to assist with securing the scuba unit after removal.
The controlled seated entry can be mastered by following five easy steps:
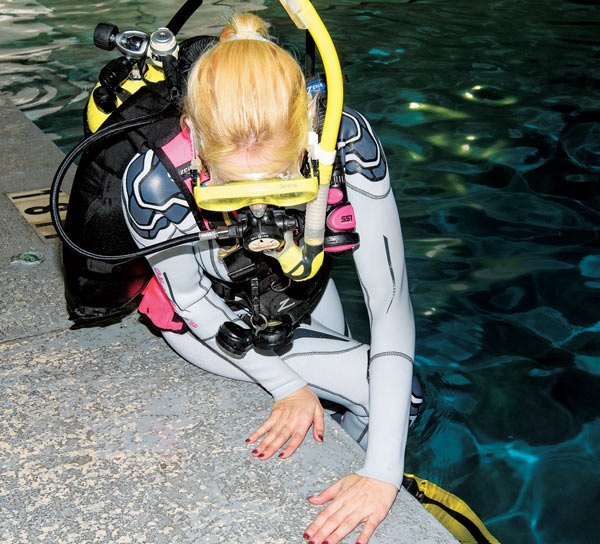
[ONE] Before practicing the controlled seated entry, check to make sure your BC is properly fastened and all hoses and accessories are secured against snagging. Prepare to enter with your mask in place, a snorkel or regulator in your mouth and your BC partially inflated.
STEP 1
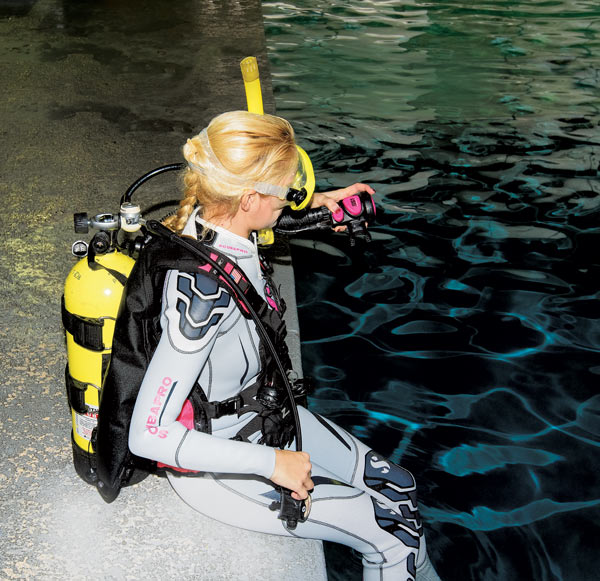
The first step begins by seating yourself on the edge of the entry platform or, in our case, the pool deck. Don your fins and scuba unit. Your buddy or divemaster may need to assist you when donning the scuba unit. After the unit is in place, confirm that the gear is secured properly. Hoses and gauges need to be clipped and stowed to avoid the possibility of getting caught on the platform. Now partially inflate the buoyancy compensator (BC), don your mask and place the regulator or snorkel in your mouth (Photo 1). As you begin the entry, you are seated so that your bottom is near the edge of the platform, your legs are bent at the knees and your lower legs and feet are in the water.
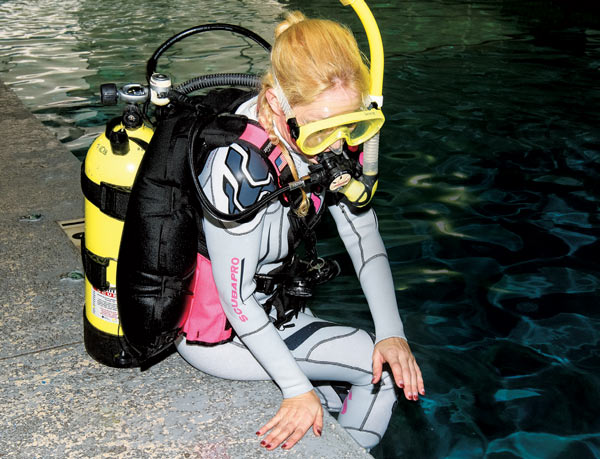
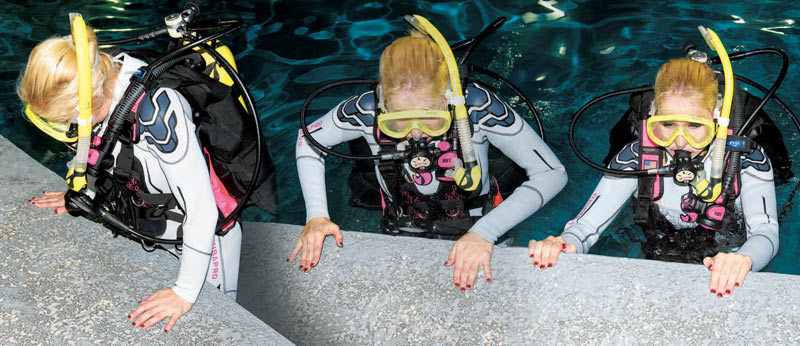
[TWO] Place the heel of your right hand on the edge of the pool deck, fingers facing the deck and the wrist against your thigh.
STEP 2
For the CSE to be successful, proper placement of the hands is critical. To begin this step, place the heel of your right hand on the edge of the pool deck, fingers facing the deck and the wrist near your thigh (Photo 2). This hand position may feel awkward at first, but hand placement — with the heel of the hand on the edge of the platform and the fingers pointing away from the water — is important as you initiate Step 3.
For this exercise, the model shown here is entering to the right, but the CSE is performed the same way whether you pivot to the right or the left. You will maneuver your body in the direction of your hands.
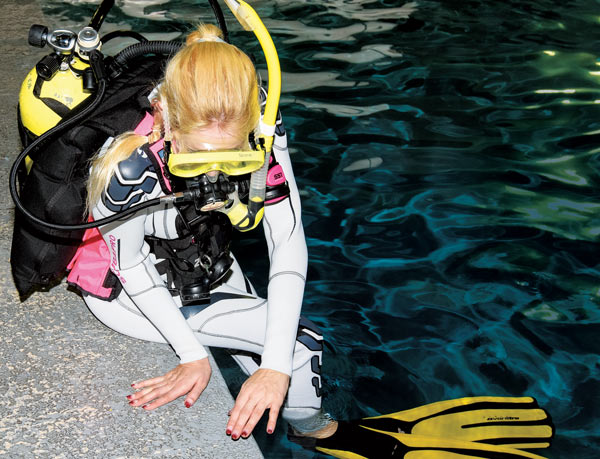
[THREE] Move your left arm across your torso and onto the deck as you twist to the right, transferring your weight onto your arms.
STEP 3
The next three steps are broken down for the purpose of explanation but, when you perform the entry, will be executed in one continuous pivoting motion. You begin seated on the pool deck facing the water and finish floating in the water facing the deck. During the entire process, you will remain in control of the entry.


With gear in place and right hand positioned as in Photo 2, move your left arm across your torso while twisting to the right, pivoting on the right hand, transferring your weight onto your arms. The right arm will remain straight (vertical to the pool deck), allowing you to stay close to the edge of the pool (Photo 3).
[FOUR] The left arm remains vertical to the pool deck with fingers pointing toward the deck.
STEP 4
This step begins as you place your left hand on the pool deck. The left arm will remain vertical to the pool deck with fingers pointing toward the deck. The hands will be shoulder-width apart. You will be leaning slightly forward, facing away from the water (Photo 4). At this point you have the option of stopping the entry process if needed or continuing on to Step 5.
[FIVE] With both hands and arms in the position shown in Step 4, slowly lower yourself into the water.
STEP 5
The final step provides a transition from pool deck to water. Done correctly, there will be little or no splash upon entry. With both hands and arms in the position shown in Step 4, slowly lower yourself into the water (Photo 5). Your partially inflated BC will provide the buoyancy needed as you lower into the water. At this point you may wish to add more air to your BC to float comfortably at the surface while you wait for your buddy to enter.
After reviewing the steps for the controlled seated entry, it is easy to understand why many divers prefer this method of entering the water. The prime benefit is that you are in control at all times and feeling in control helps calm pre-dive anxiety or jitters. You also have the option of halting the entry if needed, which cannot be done once you’ve initiated the giant stride or back roll. Both of these methods can create a jarring entry if not done correctly. We suggest you take time to practice the CSE so you can move with confidence from Step 1 to Step 5. This will enable you to start your dive with a gentle, easy entry.
The Modified Controlled Seated Entry
The controlled seated entry described in this column might need to be modified for those with certain mobility issues. If you have particular physical concerns, discuss them with your instructor. Together the two of you can likely come up with a modified seated entry technique that will get you in the water safely and easily.
Story and photos by Barry and Ruth Guimbellot