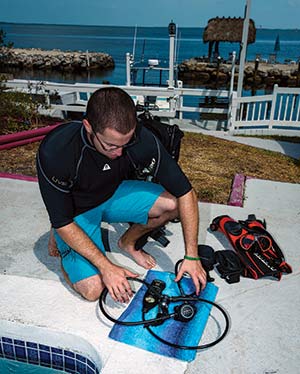
Now that your fun day of diving is over, it is time to disassemble your scuba unit. If you are on a boat it might be easier to leave your tank set up in the tank rack while disassembling the unit. If diving from shore, find a clean, flat area to work from.
Secure the tank unit so it will not fall over. Turn the air completely off by turning the tank valve in a clockwise direction (Photo 1). Next, depress the purge button on your primary second-stage regulator to make sure all the pressurized air is purged from the regulator system. If the system is still pressurized, you will be unable to unscrew the regulator yoke knob from the tank.
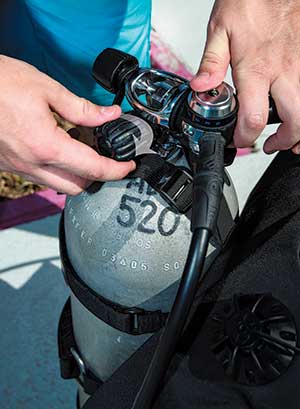
[ONE] Turn the air off before you begin disassembly. With the tank valve closed, purge remaining air from the regulator system.
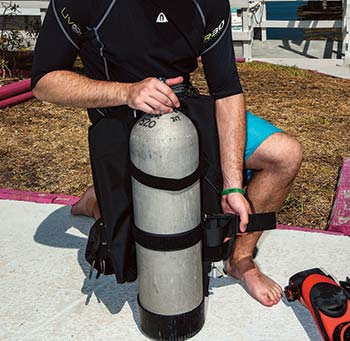
Once all the air is released from the regulator hoses, disconnect the regulator inflator hose from the buoyancy compensator (BC) inflator mechanism by the grasping the BC inflator hose connector with the thumb and forefinger and pulling the sliding piece away from the end of the regulator hose. Unlocking the mechanism that holds the inflator hose to the BC allows you to remove the hose (Photo 2).
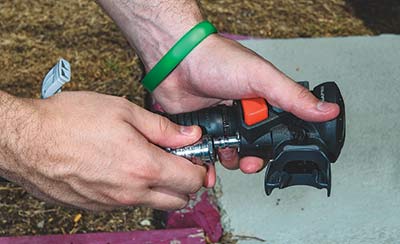
[TWO] Disconnect the low-pressure inflator hose from the BC.
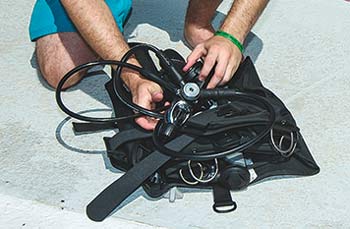
Unclip the octopus and any computer or pressure gauges from the BC (Photo 3). With one hand, grasp all the hoses together and with the other hand loosen the first-stage tank yoke from the tank air valve (Photo 4). Now dry off the dust cap that protects the orifice of the first-stage regulator. Many people use air from the tank to dry the dust cap. If using this method, open the tank valve slowly to keep from releasing a pressurized and loud blast of air. Be careful to not blow air directly into the orifice of the first-stage regulator. Doing so can force debris or water deep into your first-stage regulator. Once dry, replace the dust cap on the first stage and use the tank yoke knob to secure the cap in place. Gently coil the hoses of the regulator in a circle and place the regulator away from any sand or debris (Photo 5).
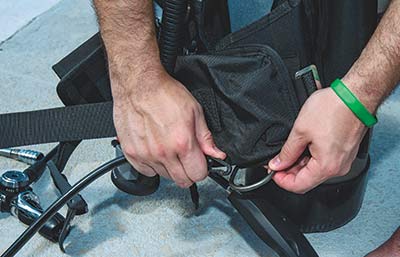
[THREE] Unclip the alternate air source and any computer or pressure gauge hoses from the BC.
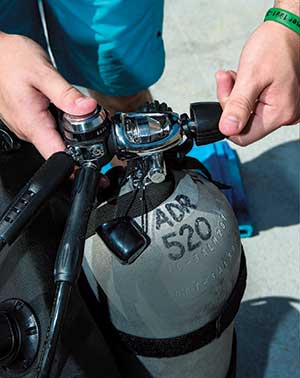
[FOUR] Loosen the first-stage tank yoke from the tank air valve by turning the valve counterclockwise.
[FIVE] Place the regulator away from any sand or debris.
If you have a weight-integrated BC, remove the weight pockets and place them on the ground close to the BC. Once the weight pockets have been removed, it is time to remove the BC from the tank. Unbuckle and loosen all straps that secure your BC to the tank (Photo 6). Now gently lift the BC off the tank. As before, be sure the tank is secured between your legs or in a tank rack so it will not fall over. After disassembly, some people like to position the tank between the two weight pockets so the tank does not roll around. If you are on a boat, replace the tank in the designated tank holder.
[SIX] Unbuckle and loosen all straps that secure the BC to the tank.
After removing the BC from the tank, place the BC in a clean area free of sand or debris. Lay the BC down with the tank straps under the BC and the vest area facing up. Open the BC and lay the regulator and gauges on top of the BC (Photo 7). Now fold the sides of the BC over the assembled gear, to keep the gear neatly secured in one place.
[SEVEN] Loosely coil the regulator system inside the BC to keep all dive gear together.
Place all your gear in a dive bag and check the area to make sure you’re not leaving anything behind.
Now sit back, relax and start planning your next dive adventure.
Story and photos by Barry and Ruth Guimbellot

