Donning the scuba unit is a task that can range from relatively easy to somewhat strenuous, depending on the circumstances and the technique used. Some techniques can be performed without assistance; others require help from your buddy.
When diving from a boat that has tank racks behind benches on the dive deck, you can gear up from a seated position, making the task fairly simple. Just sit in front of your unit, slide your hands back through the buoyancy compensator (BC) armholes, pull your arms forward and, bingo, you’re in.
If there is a picnic table or other stable waist-height platform nearby, the same technique can be used when gearing up on shore. However, it’s good to have someone steady the tank as you prepare to insert your arms.
The next-easiest technique is donning the unit in the water. When entering from shore, divers often inflate the BC, float it into waist-deep water and then gear up. This technique may seem a bit awkward at first, but once you get the hang of it, it’s simple. Since the weight of the unit is buoyed by the water, it is not strenuous.
When there is no tank rack, bench or table available and the entry area is not conducive to floating the unit into the water, the buddy lift is the technique of choice.
The buddy lift requires two people, preferably buddies, working together with the common goal of both getting geared up and going diving. The buddy lift is easiest to perform when you follow a four-step procedure to get the first buddy geared up and then reverse roles and repeat the process for the second buddy.
Step 1
Since the buddy lift requires lifting and holding the scuba unit while your buddy maneuvers into it, it does require some physical exertion. Therefore, you want to make sure that everything is ready and in place before beginning the lift.
First, verify that all hoses are correctly attached, properly routed and secured to the BC. Confirm that chest and waist straps are in the open position and not tangled. The objective is to ensure that the BC is ready to don once it is lifted off the ground.


To make it easier for the lifter, you want to keep the BC as light as possible. If using integrated weights, do not insert them into the BC until the buddy lift is completed and both buddies are geared up. To minimize the moving around you’ll need to do after the unit is donned, be sure to place your weights, accessory gear and mask and fins nearby where they can be easily retrieved on your way to the water.
Although the buddy lift is most commonly used when gearing up on shore, it also is used on boats that do not have tank racks and benches on the dive deck. However, any maneuver is more difficult when performed on a boat, especially one that is rocking and rolling with the water movement, so use caution.
Regardless of where the buddy lift is performed, if the buddies are significantly different in size and strength, don the larger/stronger buddy’s unit first. That way the smaller buddy spends less time wearing the scuba unit before entering the water.
As demonstrated in Photo 1, begin the process with both divers fully suited up in the necessary thermal protection and standing in a line in front of each other, the assisting buddy in the rear. Position the stronger diver’s scuba unit on the ground between the two, with the BC lapels open wide.
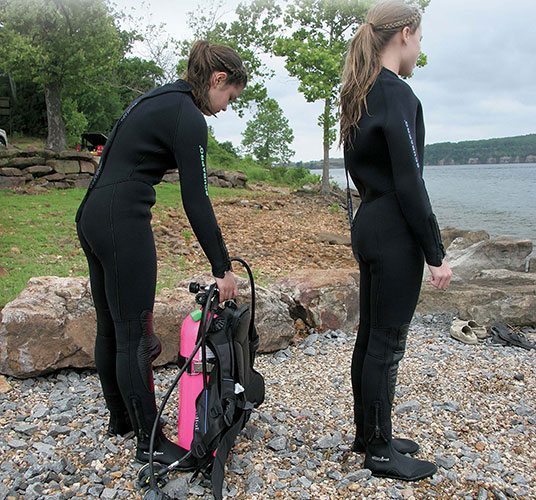
[ONE ] Begin by ensuring that the scuba unit is ready to be donned and stand it between you and your buddy. The larger/stronger buddy should be first to don her unit.
Step 2
Bending her knees and keeping her back straight to avoid back injury, the assisting buddy grasps the tank by the valve and the boot end and lifts it to her thigh, with the BC open and facing away (Photo 2). She holds it as upright as possible to make it easier for her buddy to locate the BC’s armholes.
The major concern with this maneuver is back injury. As a precaution, lift with the legs by squatting to pick up the scuba unit rather than bending over. If the smaller buddy is unable to lift the scuba unit to her thigh, her buddy should help lift and position the unit on one thigh, then turn around and back up to the unit for donning.
Since the thigh muscles are stronger than the arms, they are used to bear the weight of the scuba unit while it is being donned. After the unit is raised to the thigh, one hand secures it at the tank valve while the other steadies it on the thigh in preparation for the next step.
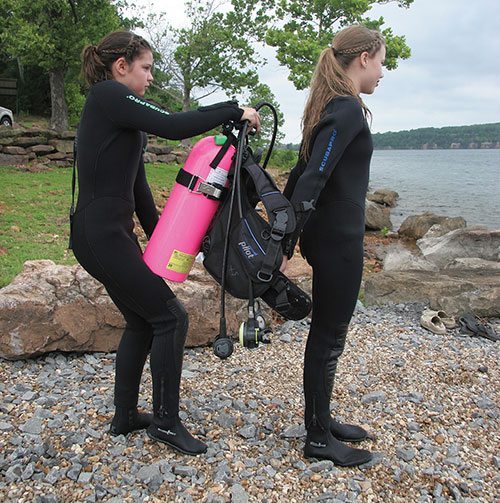
[TWO ] To prevent injury, keep a straight back and do not bend at the waist as you raise the unit to your thigh, where the BC armholes are accessible to your buddy.
Step 3
The assisting buddy continues to balance the scuba unit on her thigh while her buddy slips her arms into the BC (Photo 3). Once the arms are inside the holes, the assisting buddy raises the unit until the arms are completely through. Now the weight of the unit can be shifted onto the buddy’s shoulders. If there is a significant difference in height, the taller buddy may need to bend down to transfer the weight of the unit onto her shoulders.
The bottom of the scuba tank should remain on the assisting diver’s thigh for stability until the BC is securely settled on the buddy’s shoulders. This step of the donning process should take no more than a few seconds.
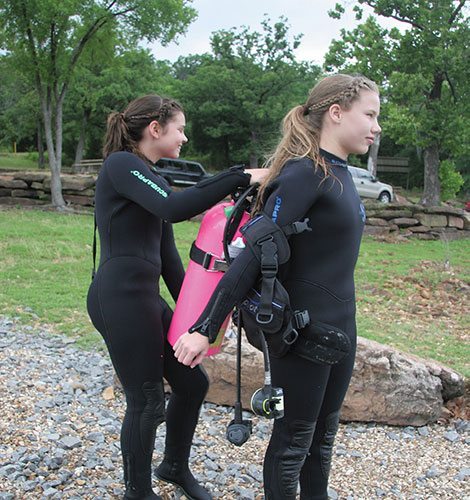
[THREE ] Without delay, the donning buddy places her arms through the BC armholes as the assisting buddy raises the unit into place.
Step 4
As soon as the scuba unit is securely in place, the donning diver carefully bends forward at the waist (Photo 4). This transfers the weight of the unit to her back and allows her to fasten the BC closures.
Before bending forward, tell the assisting diver what you are about to do; then do it slowly. Otherwise, the assisting diver could be in position to be struck in the torso by the bottom of the tank as it heaves upward.
The assisting buddy should continue to steady the scuba unit while her buddy fastens the waist and chest straps of the BC and pulls the shoulder straps comfortably snug. Once this is complete, the assisting buddy can let go as the donning buddy fastens up her gauge console and octopus second-stage regulator.
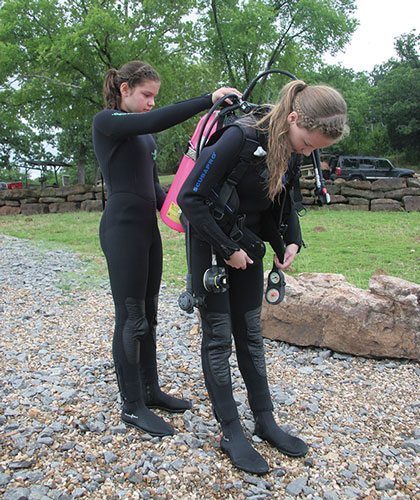
[FOUR] Once the weight of the unit is transferred to the donning buddy’s shoulders, she cautiously bends forward and fastens the BC closures.
Reversing Roles
To complete the buddy lift donning procedure, the buddies reverse roles and repeat the four steps. The stronger buddy, whose scuba unit is already in place, lifts and holds her buddy’s scuba unit as described earlier (Photo 5), while the buddy dons and secures the unit.
Once both buddies have donned, fastened and secured their gear, the process is complete and ready for the predive safety check.
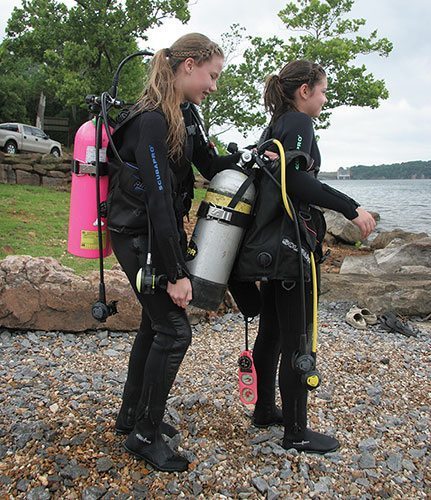
[FIVE ] With half the maneuver complete, the buddies reverse roles and the assisting buddy now dons her scuba unit.
Story and photos by Lynn Laymon