You’ve heard the adage, “Use it or lose it!” There is a lot of truth in that. In Open Water class you learn just enough to get you out there diving safely in the environment in which you were trained. Then the learning process continues; experience and continuing education are great teachers.
But if you don’t follow up and begin using those newly acquired skills within a reasonable time, they deteriorate and eventually disappear. The scuba unit removal and replacement skill is a good example. If you don’t occasionally practice it, your ability to perform it effectively will diminish substantially.
Some think, “So what? Why would I ever want to remove my lifesupport system underwater?” Here are a few reasons.
The fact is, a diver seldom needs to remove and replace the scuba unit while underwater. However, if only one real-life situation calls for performing this exercise, it’s important to be prepared to execute it correctly.
Entanglement is one such real-life situation. When diving a site that is popular with fishermen, it isn’t uncommon to encounter balls of monofilament line hanging from coral heads and underwater structures or even free floating in the water column. This is something you want to avoid, but every once in a while a diver will not pay attention and become snagged, even seriously ensnarled.
The most desirable solution is for your buddy, who should be close by and attentive, to carefully clear the entanglement, as you cease all activity and remain motionless. However, sometimes that doesn’t work. In this case you may need to carefully slip from the scuba unit and clear the entanglement yourself.
There is a difference between removing the scuba unit, as learned in Open Water class, and slipping from an entangled unit. The typical removal process involves moving the buoyancy compensator (BC) around behind you from left to right and then swinging it off your right shoulder (details later). This maneuver works when the scuba unit is not entangled.
While slipping from an entangled scuba unit, the BC remains stationary because it is caught on something, and you must maneuver yourself from within it. Of course, both exercises require that the regulator remain in your mouth.


Once you are out of the BC, turn and face it and carefully clear the entanglement. This might be as simple as removing a strand or two of monofilament line from the regulator yoke screw, or could require extensive cutting with your dive knife. Either way you must use extreme caution to avoid further entanglement.
Once the entanglement is cleared, move away before attempting to put on the scuba unit.
Even if you never have reason to remove and replace the scuba unit while at depth, it is important to maintain proficiency — just in case. And knowing that you possess the ability to perform this skill increases your confidence, making you a safer, more competent diver.
Step 1
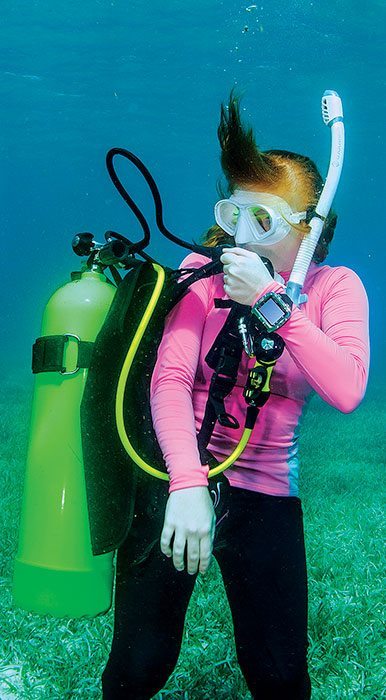
Step 1 involves preparing the BC and accessory gear so nothing will interfere with removing and replacing the scuba unit. Begin by unclipping anything, such as a gauge console or octopus, that extends across the front of the BC and would prevent you from opening it (Photo 1). Once the hoses and accessories are positioned so the front of the BC is clear and can be held open, the unit can be removed.

[ONE] Step 1: Unfasten all BC closures and any hoses that might impede removing the scuba unit.
Step 2
The scuba unit is removed and replaced using much the same technique as when removing and replacing a suit coat or jacket. Begin with the left arm and work your way around to the right side.
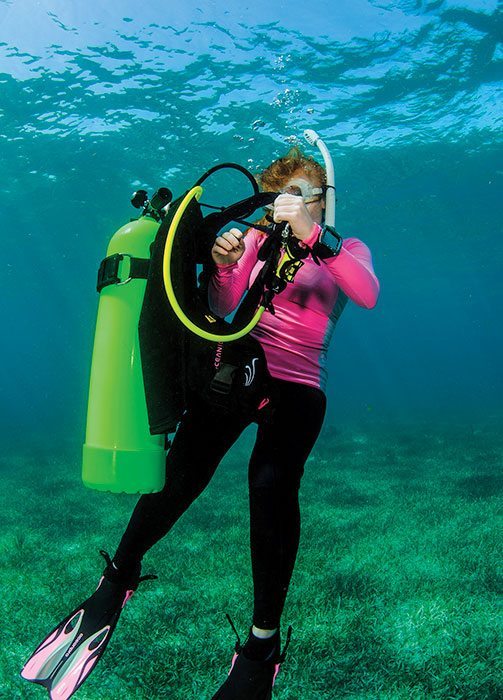
First, remove the left arm from the BC armhole as you slide the BC off the shoulder and rearward (Photo 2). To control the unit the right hand maintains contact with the right lapel of the BC or the bottom of the scuba cylinder and the left hand is used to hold the unit close to the body. It is important that the left side be removed first; otherwise the hose to the primary second-stage regulator will end up wrapped around your neck and eventually pulled from your mouth.

[TWO] Step 2: Always begin by removing your left arm from the BC armhole and sliding the scuba unit behind you.
Step 3
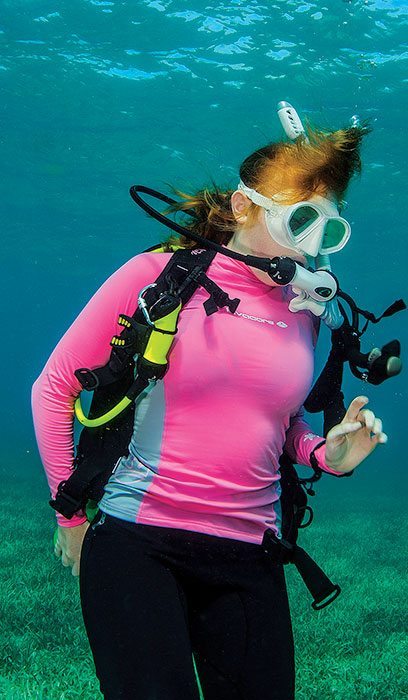
After the left arm is clear of the armhole, use the left hand to guide the unit behind your back to the right side so it hangs from your right shoulder (Photo 3).
[THREE] Step 3: Use the left hand to steady the unit as you remove your right arm from the BC right armhole.
Step 4
Bringing your left hand around the front, use it to steady the unit as you slip your right arm from the BC armhole and swing the unit around in front of you. To do this, grasp the BC by the shoulders and turn the unit until the cylinder faces away from you (Photo 4). Perform this step in a way that the primary regulator does not pull from your mouth.
Stabilize the unit and remain in that position for a few seconds to simulate working through a problem before putting on the scuba unit.
[FOUR] Step 4: Continue the process by swinging the unit in front so the tank is on the outside and the BC lies open before you.
Step 5
Step 5 is a series of maneuvers that basically repeat steps 1 through 4 in reverse order and end with the scuba unit in place and secured.
Begin by placing your right arm through the BC’s right armhole (Photo 5). Swing the unit behind your back with your right hand on the tank as you place your left arm through the left armhole and pull the BC squarely into place on your shoulders. It is the same technique as donning a suit coat, starting with the right arm first. Now, fasten all closures and buckles, reconnect gauges/console and accessory gear and check that your octopus is properly aligned and accessible. Add or vent air as needed to maintain neutral buoyancy.
[FIVE] Putting the BC back on involves steps 1 through 4 performed in reverse order. Begin by placing your right arm through the BC’s right armhole and sliding the unit to the left behind you. Then don the left side, fasten the BC closures and secure accessories.
Word of Caution
Removing and replacing the scuba unit is significantly easier when performed while standing on a solid surface, like the bottom of a pool or even the ocean, lake or quarry floor. That is fine for learning the skill and periodic practice. However, in reality the need to perform the skill does not always occur in those relatively controlled conditions. Therefore, once you become comfortable removing and replacing the scuba unit at depth, try executing it midwater.
Aside from the fact that you are not standing on a solid surface, the first major difference you’ll notice is buoyancy. Since you are midwater you most likely have air in your BC. Be prepared to adjust buoyancy.
Depending on the type of weighting system you are using, when you remove the scuba unit it may float up as you sink or vice-versa. If using BC-integrated weights, the scuba unit will most likely sink when removed, and you may tend to float upward. This can be dangerous. If your weights are worn on a belt around the waist, the scuba unit may float upward and you will sink.
The inevitable change in buoyancy of both the diver and the scuba unit must be considered prior to beginning the removal process; have a plan for how you will control buoyancy. It is important to maintain secure physical contact with the unit and to keep the combination of the scuba unit and your body neutrally buoyant throughout the skill.
Building Confidence
Perfecting the scuba unit removal and replacement skill while standing on a solid surface will make you a better diver, but it is only the first step. From there try it while hovering a few feet off the bottom; then try it midwater.
Successfully completing each step will increase your confidence and make you a more self-sufficient diver. Once you have removed and replaced the scuba unit midwater without a hitch, don’t let it be the last time. Practice often. You may never need the skill in an emergency, but if you do, you will be prepared.
Story by Lynn Laymon | Photos by Barry and Ruth Guimbellot