You take your regulator into a local dive center for its annual service and pass it over the counter to the salesperson, who hands you a work ticket in exchange. A few days later you return and the person behind the counter hands the regulator back to you — a bit cleaner and with a little plastic bag full of miscellaneous O-rings and odd-looking metal parts. Otherwise, the regulator looks pretty much the same as when you brought it in for service.
It might cross your mind to wonder what the repair technician actually did to your regulator. The sales slip probably says simply, “regulator service.” Chances are the bottom line suggests that considerable work has taken place, but you’re really not sure what. Should you have the opportunity to ask the store’s equipment repair specialist what he or she did, the answer might be something like, “I replaced the O-rings and the filter, checked the internal parts for wear and corrosion, inspected the hoses and cleaned, adjusted and tested it.” Still somewhat mystified, you depart.
Do you notice that your regulator now works better? Unless you were experiencing a problem when you brought it in (e.g., free flow, hard breathing), maybe not. Regulators are complex but reliable mechanisms, meant to give you years of trouble-free service — if you have them serviced at least once a year, or more with heavy use.
Perhaps dive industry professionals have created the erroneous impression that annual regulator service is no big deal, by commonly referring to it as a “tuneup.” Done correctly, it’s more like a complete overhaul. If we followed the example of the automobile industry and listed each part replaced and every task performed during a regulator overhaul, we’d need a mighty long work order.
So what is involved in routine regulator service? Let’s go through the process from beginning to end. When we’re finished, you still won’t be able to service your own regulator, but you’ll have a much better appreciation for the training and skill of the professional repair technician who knows how to take the puzzle apart and put it back together again in perfect working order.
Regulator Basics
You’ve probably heard the terms balanced and unbalanced, piston and diaphragm, pilot and down- stream, applied to regulator designs. Regardless of which type you own, an overhaul involves similar steps, although on some different parts. A basic overview of how a regulator works will help you understand what a repair technician does during an annual service.
Modern scuba regulators are all two stage. The first stage is the part of the regulator that mounts on the scuba tank. It takes breathing gas from the cylinder and reduces it from a pressure of as much as 3,500 pounds per square inch (psi) when full, to a pressure of somewhere between 125 and 160 psi, depending on the regulator’s design. This is called the intermediate pressure, and it flows through the low-pressure hoses to both second stages — primary and octopus — and the inflator hose(s).
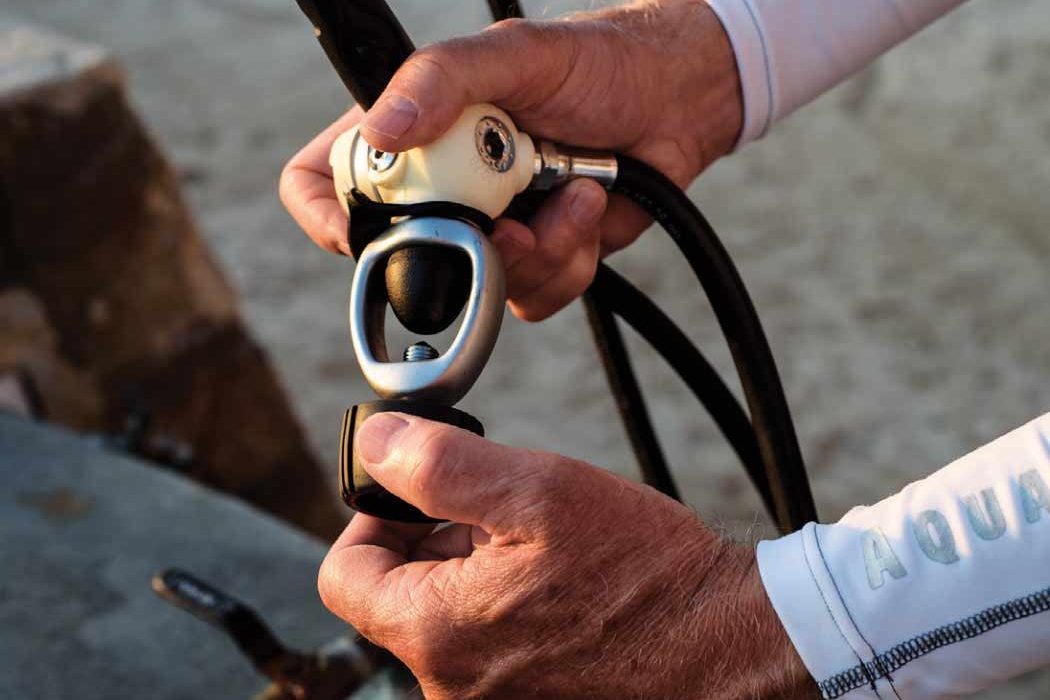
The second stage of a regulator is the part that your mouthpiece is attached to. This compact capsule reduces intermediate-pressure air to ambient pressure. That is, it reduces the pressure of the air you breathe to match the pressure of the surrounding water (e.g., 14.7 psi at the surface, 58.8 psi at four atmospheres, about 100 feet [30m]). It is because the second stage delivers air at ambient pressure that you are able to inhale comfortably through the regulator.


The terms balanced and unbalanced refer to how the first stage handles the decrease in incoming pressure as the gas in the scuba cylinder is depleted. With older, unbalanced regulators, it became harder to breathe as the tank pressure declined to around 700 psi or less. Most of today’s modern first stages are balanced, which refers to internal design features that hold intermediate pressure — and therefore breathing resistance — constant, regardless of tank pressure. Balanced regulators are more complex to service than unbalanced models.
First-stage regulators are either piston or diaphragm design. Although the mechanisms are different, their function is the same. As the diver inhales, air pressure within a chamber in the first stage decreases, causing either a metal piston or a flexible diaphragm to move. This, in turn, causes a valve to move away from its seating surface (i.e., open), allowing breathing gas to flow from the scuba cylinder into another chamber in the first stage. As pressures within the first stage equalize, the valve closes.
Piston regulators have fewer moving parts, making some models easier to service. However, internal parts in many piston models contact the water, increasing the potential for damage due to corrosion and salt crystallization.
Second-stage regulator designs are either downstream or pilot. Downstream-valve second stages are the familiar round version, with a large internal diaphragm that pushes on a lever when you inhale. The lever opens the valve from the low-pressure hose, permitting air to flow until ambient pressure is reached.
Pilot-valve second stages are elongated in appearance. They use a second valve and chamber that assist in opening the main valve from the low-pressure hose. With more moving parts, the pilot style is more complex to service.
This overview of how a regulator functions is somewhat simplistic, but it should allow you to appreciate that a number of parts are moving constantly in rapid succession and are therefore subject to continuous wear. Even if you don’t use your regulator much during a particular year, O-rings may deteriorate, so service is still recommended. Some regulator manufacturers even require annual professional maintenance to maintain the warranty.
If your annual diving is limited to a short season or only one big trip a year, equipment repair technician Briton Smith at Scuba Set Adventure Center in Washington, advises that you have your regulator serviced before you store it, “Otherwise, salt can continue to damage it while you are taking time off from diving.”
 Servicing the First Stage
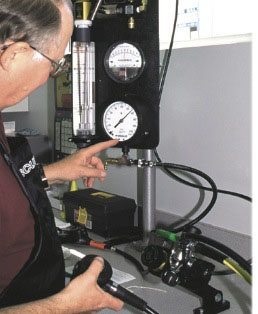
Before beginning to disassemble the first stage, the repair technician determines whether it is functioning properly. To do this he tests the intermediate pressure by hooking up a low-pressure hose to a pressure analyzer. In addition to checking that the pressure level is within the range specified by the manufacturer for this particular model, he checks for fluctuations in pressure, which may indicate internal problems. The test serves as a benchmark for the technician as to the need for replacement of particular internal parts.
A meticulous technician draws a diagram or otherwise labels each hose so he is certain to replace it in the same port it came from. He then removes the hoses from the first stage, replacing them with temporary plugs so he can use compressed air to help remove certain parts without damaging them. He removes the yoke screw and the yoke, leaving just the body of the first stage.
Now it’s time to start removing the internal parts, beginning with the retaining ring and the filter. In this example, the technician is servicing a balanced diaphragm regulator, so he’ll be removing a large retaining nut, two springs, the diaphragm and several pieces associated with the poppet assembly. In addition to a vice and various-size wrenches, specialized tools — often provided by the regulator manufacturer — may be required to separate certain parts. On piston regulators, the parts are different but the process is the same.
Once the first stage is fully disassembled, the repair technician might have up to 30 parts, including O-rings of various sizes, lined up in front of him.
Cleaning is the next step. Metal parts are cleaned with a weak acid solution and may be run through an ultrasound machine to ensure removal of all salt deposits and corrosion. After cleaning, the parts are rinsed thoroughly and dried with compressed air.
Each metal part is inspected for wear and replaced if necessary. Plastic parts are cleaned by hand. O-rings are automatically changed even if they don’t show deterioration; most regulator manufacturers offer kits containing each of the O-rings and other parts commonly replaced at each annual overhaul.
In preparation for reassembly, the repair technician lays out all parts in the order they’ll be reinserted into the regulator. Even though a technician may have overhauled hundreds of similar regulators, a neat and orderly work area helps avoid time-wasting mistakes such as losing a part or missing a piece during reassembly. Chances are, he keeps the manufacturer’s service manual close at hand for reference.
Each part is then replaced in turn. Metal threads and O-rings are lubricated and special tools are used to reinsert the tiny pieces of the poppet assembly. Coaxing O-rings into place requires patience and a steady hand; care must also be taken to place the diaphragm rightside up. The yoke, yoke screw and dust cap are the last parts to be reattached.
Servicing the Second Stage
After the first stage has been reassembled, it is set aside while the technician turns his attention to the hoses and second stages. The hoses are detached and each is inspected for cracks and bulges, including underneath the hose protectors. The O-rings on each end are replaced.
On the primary second stage, the mouthpiece and exhaust tee are first removed and the exhaust valve inspected for its ability to seal. The case is opened and the diaphragm removed, followed by the lever, downstream valve assembly (or the pilot valve assembly) and seat. Again, up to 30 parts might lie in front of the technician when disassembly is complete.
As with the first stage, metal parts are cleaned with a mild acid solution and perhaps subjected to ultrasound treatment, then dried with compressed air. O-rings and the valve seat are replaced, commonly from a manufacturer’s kit. If necessary, the exhaust valve is replaced.
Reassembly of the second stage is fairly straightforward. Before the main valve is returned to the case, the technician sets a rough adjustment that controls inhalation effort. The diaphragm is closely inspected for pinholes, which could cause water to be inhaled. The low-pressure hose is reattached. The same process is then repeated with the octopus or integrated extra second-stage regulator.
Final Stages
Once overhaul of the first and second stages is complete, they are reattached. Prior to final inspection of the regulator, however, air pressures must be checked and adjusted. Intermediate pressure emerging from the first stage is adjusted by attaching the regulator to a flow-and-pressure analyzer, or to a scuba tank and intermediate-pressure gauge. First stages differ in the technique used to fine-tune the intermediate pressure.
The second stages are then checked for breathing resistance and free flow under pressure and the valves adjusted accordingly. Some scuba repair facilities are equipped with automatic breathing machines, which break in new valves by setting a groove in the seat. Thus, the diver doesn’t have to worry about changes in the way his regulator functions after the first few dives.
When each of the pressures is adjusted so that the regulator breathes easily but doesn’t free flow, the repair technician completes final reassembly. Old parts are placed in a plastic bag and attached to the regulator so the customer will know that they have indeed been replaced.
The scuba repair technician has one more important job to complete — recording information in the customer’s permanent record, including the work performed and specific pressures set. These records protect the customer’s warranty, providing an ongoing record of service on this particular regulator configuration. For an experienced technician, the entire process takes up to two hours of solid work time, depending on the condition the regulator was in when dropped off.
This description of regulator overhaul has not covered peripherals, such as the gauge console or air-integrated computer, which should also receive required service along with the first and second stages. An extra second stage integrated with the buoyancy compensator (BC) is still part of the regulator system and should be serviced at the same time. If the extra second stage and power inflator are within the same mechanism, an additional level of complexity is added to the service task.
A final word on regulator service: Don’t try this at home. There are virtually no user-serviceable parts in this mechanically sophisticated dive equipment. Care for your regulator by rinsing thoroughly and air-drying after every dive outing and store it properly between trips.
Faithfully keep the annual maintenance schedule by putting your regulator in the hands of a trusted repair technician certified for your brand and model. Treat your scuba regulator right and you’ll be rewarded with years of trouble-free diving.
Regulator Maintenance Tips
To ensure that your regulator performs well between overhauls, follow these simple maintenance tips:
Replace the dust cap that fits over the first-stage inlet as soon as you disconnect the regulator from the cylinder. Be sure the dust cap is dry before you attach it, or you could introduce water into the first stage.
Once the dust cap is in place, rinse the regulator system in fresh water after each use. This helps remove salt crystals, sand and other potentially damaging substances. Let water run through the mouthpiece and exhaust tees, but avoid depressing the purge button, as this could allow water to travel up the hose and into the first stage.
After a dive trip, soak the regulator system in fresh water overnight, then rinse thoroughly. Lay the regulator in a shady place and allow to air-dry completely. Store it in a cool, dry place, taking care not to coil hoses tightly. Do not hang the regulator from its first stage, as this places stress on the hoses.
Story by Linda Lee Walden, Photos by Lynn Laymon