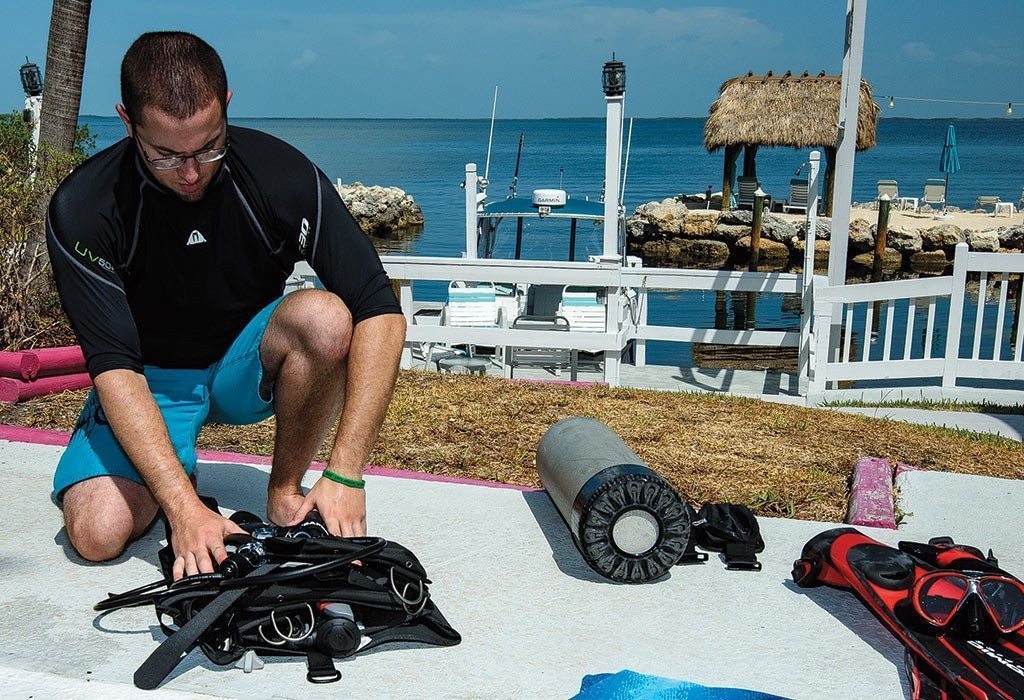
Where, when and exactly how you go about disassembling your scuba unit depends on whether you are diving from shore or a boat and if you are changing to a fresh tank between dives or are disassembling the unit to pack away in your gear bag.
When shore diving it is best to wear or carry your scuba unit back to base camp before disassembling. Under all circumstances, avoid pulling the unit across the ground or allowing the second-stage regulators to drag in the sand. Many times it is safest to wear your unit back to the parking area before tearing it down; that way it stays safely off the ground and you can place the disassembled gear directly into your vehicle.
Use caution when disassembling the scuba unit on a boat. Typically space is at a premium and other divers are doing the same thing you are at the same time, often in tight quarters.
Unless seas are flat-calm it is best to disassemble your gear before the boat gets underway for the return trip to shore, or wait until the vessel is secure at the dock. Tearing down a scuba unit on a rocking and rolling boat can be challenging, not to mention dangerous.
When disassembling your gear on a boat, try to minimize your footprint. As you remove the regulator and buoyancy compensator (BC), place them directly in your gear bag; this gets them out of the way of other divers.
Disassembling a scuba unit can best be accomplished in five easy steps.
Step 1
First, position the unit upright on a firm, level surface and if possible, stand behind it. On the beach this might be on the base camp ground cloth; on a boat it is on the dive deck near your gear bag. If the boat has tank racks behind bench seating, as is typical on many dive boats, you can complete this without moving the scuba unit from the rack.
Steady the unit with one hand as you close the air valve control knob with the other. Rotate the knob clockwise until it will turn no further, but do not force it beyond the natural stopping point.


[ONE] After the air has been turned off, both second-stage regulators need to be depressurized before attempting to remove the first stage from the tank valve.
Step 2
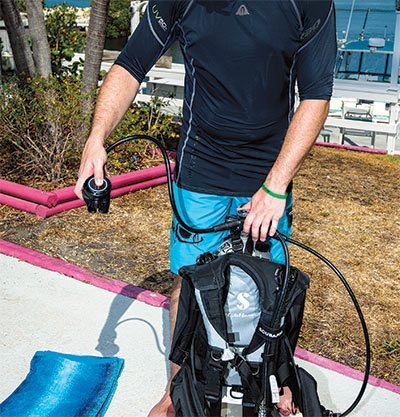
Even with the air turned off the system is still pressurized. Before the regulator can be removed from the tank valve the system must be purged (Photo 1).
Depressing the purge button of both the primary and secondary (safe second) second-stage regulators allows the pressurized air to escape. Keep the buttons depressed until rushing air can no longer be heard.
Now depress the inflate button on the BC’s inflate/deflate mechanism. This purges the low-pressure hose. If you are finished diving for the day, you should now detach the low-pressure hose quick disconnect from the BC.
Step 3
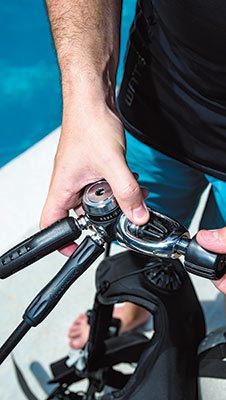
With the air valve closed and the system purged, the first-stage regulator can easily and safely be removed from the tank valve. Place one hand on the body of the first-stage regulator and grasp the yoke screw knob with the other. Be sure to steady the cylinder as you unscrew the knob. Loosen the yoke screw by turning it counterclockwise (remember, “left/loose and right/tight”). If you mounted the yoke screw correctly — only finger tight — it should turn easily now that the system is no longer pressurized; several turns will allow the regulator to slide forward and be lifted from the valve.
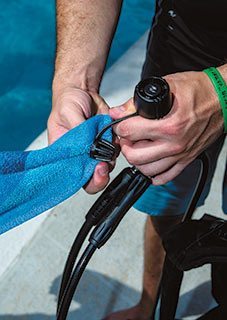
[TWO] After loosening the yoke screw and detaching the first-stage regulator from the tank valve, dry the dust cover before replacing it.
Crack the valve only long and wide enough to clear water from the cover. Use caution, however; thoughtlessly cranking open the valve for more than an instant can be annoying to unsuspecting divers nearby.
[THREE] Place the dried dust cover over the regulator’s air intake orifice anytime the first stage has been removed from the tank valve, even when you are simply transferring the regulator and BC to a fresh cylinder.
If the boat is designed with bench seating flanked by vertical tank racks, Step 3 can be completed without removing the scuba unit from the rack. That may not be the case with Step 4.
Step 4
Before attempting to remove a weight-integrated BC from the cylinder, make sure the weight pockets have been emptied of weight. If the tank strap was sufficiently tightened, as it should have been before the dive, creating sufficient slack to easily slide it off the tank may require some effort.
BC designs vary from one manufacturer to another, but most feature black plastic buckles where the strap is strung through a series of slots.
Begin by opening the buckle. Free the tail of the strap (it often is secured by Velcro) and pull the open end away from the cylinder and back toward the buckle. Continue pulling until the buckle snaps open. This will release some of the tension on the strap, but typically not enough to easily slide the BC up and off.
To release additional tension, with the buckle in the open position unthread the free end of the strap from the end slot. Now move the buckle back and forth (i.e., ratchet it open and then back toward the closed position). Steady the cylinder with one hand as you grasp the outer edges of the buckle with the other. Push/pull the buckle back past the open position using a ratcheting motion. Every ratchet will create additional slack until the strap is loose enough to be easily slid up and down on the cylinder.
Step 5
The final step in disassembling the scuba unit involves physically removing the BC from the cylinder. With the cylinder standing upright on a firm surface, grasp the BC by the collar (some models have a sewn-in hand loop at the top) or the top of the backpack with one hand. Grasp the loosened tank strap with the other hand. Place a leg against the tank to keep it secure and under control.
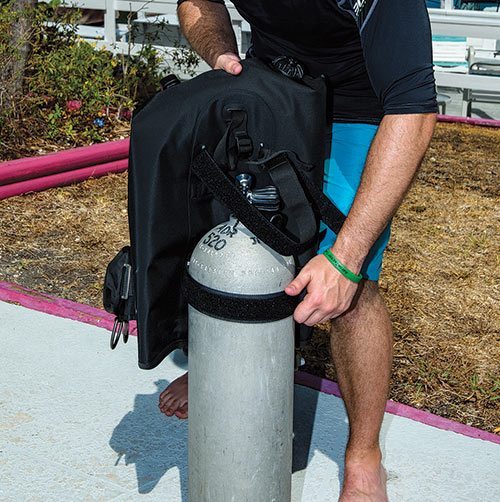
[FOUR] To remove the regulator and BC from the tank, loosen the tank strap and then grasp both the tank strap and the collar of the BC and simultaneously pull upward.
Once the BC is free and you’ve removed it from the cylinder, without delay secure the cylinder to prevent it from falling and damaging the valve or possibly injuring someone. If you are at the base camp or on a boat without tank racks, lay the cylinder down or have someone steady it until you can secure it properly.
If you are on board a boat that has tank racks, place the cylinder in the rack, but do not place the valve cap back over the tank valve, as this is the standard indication that a tank is full and available for use.
If you are done diving and ready to place the BC in your gear bag, turn it upside down and drain any accumulated water from the inside. Even better, some boats have rinse buckets where you can give your regulator and BC a quick dunk before the ride back to shore. Of course, a boat rinse does not eliminate the need to thoroughly rinse your gear once back at the dock.
Switching to a Fresh Tank
With a couple of minor twists, steps 1 through 4 apply whether you are disassembling the scuba unit to pack it away at the end of the diving day or just switching the regulator and BC to a fresh tank between dives.
With a fresh tank nearby, turn off the air and purge the system as described earlier. There is no need to disconnect the low-pressure inflator hose or detach the octopus, as you will be transferring the regulator and BC as a unit.
When you loosen the yoke screw and remove the regulator from the valve, be sure to dry and replace the dust cover; this prevents water from accidentally entering the regulator’s air intake as you transfer the BC. It is a good idea to have the dust cover secure anytime the regulator is not mounted on a tank valve.
Now, go ahead and remove the BC, with regulator still attached, from the used cylinder and transfer it to the fresh one (Photo 5). Secure the BC, mount the regulator and test the system and you’re ready to dive.

[FIVE] When switching to a fresh tank, the regulator and BC can be transferred as a unit. Be sure to have the new tank nearby and use caution to avoid leaving either tank standing unattended during the process.
Story by Lynn Laymon | Photos by Barry & Ruth Guimbellot