Your scuba gear is your life support equipment when exploring the underwater world. Taking proper care of your gear is important for your safety and to protect your equipment investment. Dive gear, especially the regulator system, is sturdy stuff. By establishing a routine that includes a few simple steps to clean your regulator after each dive, it will stay in good condition for your next outing.
Regulator Review
The purpose of the regulator is to regulate the flow of air from the tank. The scuba tank contains compressed air under high pressure, about 3000 psi (207 bar). To reduce the compressed air to a breathable level at any depth, the regulator works in two stages. The first stage (the part that connects to the tank valve) lowers the pressure to about 140 psi (9.6 bar) as it enters the hose. When air is consumed as diving depths change, the regulator compensates for the resulting changes in ambient water pressure. It reduces the intermediate pressure in the hose coming from the first stage and adjusts it to the surrounding water pressure, which means you can breathe easily and comfortably at any depth. The second stage consists of a mouthpiece, an exhaust valve (or tee) and a purge valve or button. When you exhale, your exhaled breath exits the exhaust valve into the water in the form of air bubbles. The purge button, when pressed, forces air into the second stage chamber.
When cleaning the regulator and its components, there are a few things to remember. First of all, be sure the first stage is attached to the cylinder or that the first stage dust cap is securely in place before you rinse or soak the regulator. This will keep water from entering the first stage air inlet, where the first stage connects to the cylinder valve. Secondly, unless the regulator is attached to a cylinder with the air turned on, avoid depressing the purge valve while rinsing the regulator, as this can allow water to enter the hose. When rinsing the regulator, use a gentle flow of fresh water; do not use a high-pressure stream.
Your dive gear requires periodic maintenance by a professional. Servicing should be performed as specified by the manufacturer’s warranty. Always take the time to register your new equipment warranty with the manufacturer, and keep track of your gear’s service record. If at any time the regulator does not seem to function properly, take it to your local dive center for professional inspection and servicing.
VIDEO: Storing your gear during the off season
Water, Water
Rinsing the scuba unit in fresh water after each use is a simple yet important maintenance routine all divers should establish. A thorough rinse is especially important if you have been diving in salt water because salt crystals can damage dive gear. An immediate rinse is not as critical if your dive was in fresh water. However, the gear needs rinsing as soon as possible to remove any dirt or debris that has gotten on the gear.
This can be a challenge when fresh water isn’t readily available. Many of us dive in salt water from charted boats that have a limited supply of fresh water on board. Typically, one bucket is designated exclusively for cameras while another rinse bucket is for dive gear. They are usually clearly marked but, when in doubt, ask the crew. A full fresh-water rinse of the scuba unit might not be possible until the boat is back at the dock, but whenever possible, give your regulator a quick dunk in a bucket of freshwater or a spray with a hose and then repeat with a more thorough cleaning when you have greater access to fresh water. Most dive shops and marinas have a dedicated water supply and/or rinse tank for cleaning the gear.
Some shore diving locations may have rinse facilities but most don’t. Some avid shore divers bring jerry jugs of water and/or a small cooler to the dive site, so they can soak their regulators immediately after use.
Rinsing your Regulator: 3 Methods
There are three methods commonly used for soaking/rinsing dive gear. The first method is to rinse the entire scuba unit with a hose while it is still attached to the tank and the air is still turned on. If a large fresh water rinse tank is available, a second method is to place the entire pressurized unit in the water to soak. The third method involves removing the regulator from the tank before rinsing it.
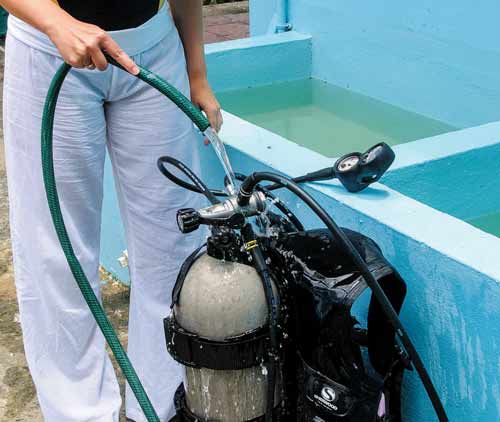
[ONE] Gently spray the entire scuba unit with water to remove any dirt or salt residue.
Rinsing your Regulator With a Hose
Using a hose for a fresh-water rinse is the first method of cleaning our gear. The scuba unit should still be fully assembled and turned on. First, gently spray the unit to remove any dirt or salt residue (Photo 1). Now individually rinse each part of the regulator. Run a gentle stream on the regulator first stage (Photo 2).
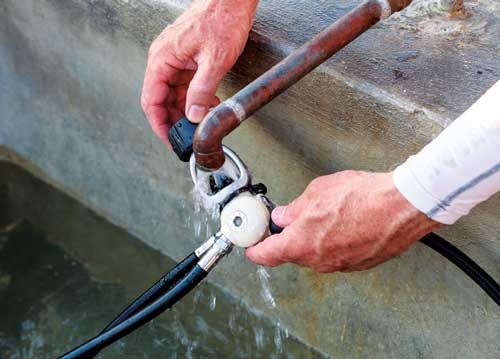
[TWO] Use a gentle stream of water to rinse debris and salt residue from the regulator.
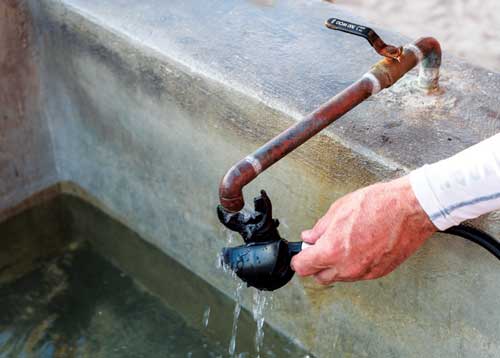
[THREE] Guide a stream of fresh water into the regulator mouthpiece allowing water to drain from both sides of the exhaust tee.
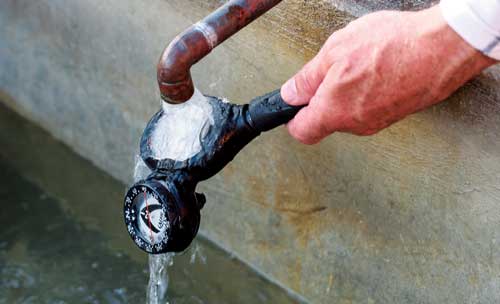
[FOUR] Rinse the gauge/computer console and the swivel connection where the gauge attaches to the hose.
Fresh-water Rinse Tank
The majority of dive resorts and dive shops have a dedicated gear rinse area with a large tank available. After diving, you can submerge your entire pressurized unit in the rinse tank and then give it a thorough rinse with fresh water. If unable to soak the entire pressurized unit in the rinse tank, at least place the second-stage regulator in the water and swish it back and forth so water can flow through the mouthpiece and exit through the exhaust tee.
Disassembled Regulator Rinse
In some instances it is not possible to thoroughly rinse the regulator unless it is removed from the scuba tank valve. After removing the regulator from the tank, carefully dry the dust cover and place it over the first-stage air inlet. Now finger tighten the yoke screw to secure the dust cover (Photo 5). This keeps the water from entering the first stage when rinsing the regulator. From this point on, use the same procedure listed above under the topic of rinsing with a hose.
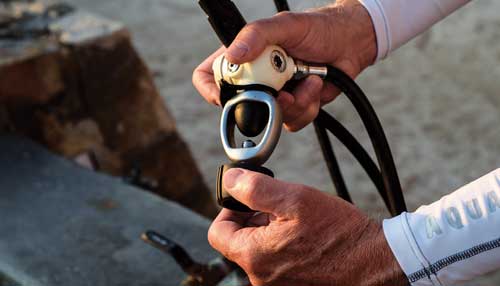
[FIVE] Make sure the dust cap is securely covering the first-stage air inlet before rinsing or soaking the regulator system.
Related Skill Video: Rinsing your BC
After a vacation with numerous dives, give your dive equipment a thorough soak and rinse after returning home. Always allow the gear to dry completely away from direct sunlight before storing it in a cool, dry place. By properly maintaining your equipment and servicing it on a timely basis, you will be able to enjoy many safe, trouble-free dive vacations.
Story and photos by Barry and Ruth Guimbellot


